7 Ways to Make Interior Paint Last Longer
Quick Summary
Interior paint longevity depends mainly on surface preparation, correct curing, and resin quality. Clean, primed walls let paint bond properly, while choosing a durable sheen and cleaning gently extends how long the finish lasts.
- Skipping cleaning and priming is the most common cause of early peeling.
- Check walls for moisture before painting, since trapped moisture causes blistering.
- Use satin or eggshell finishes in high-traffic areas for better cleanability.
- Clean walls on a schedule with mild detergent, avoiding abrasive scrubbers that remove the topcoat.
- Touch up scuffs and chips early so moisture cannot reach the substrate.
Table of Contents
- Why Interior Paint Fails Early: Adhesion, Curing and Resin Quality
- Interior Wall Preparation Before Painting: Where Most Jobs Succeed or Fail
- Best Paint Finish for High-Traffic Areas and How Sheen Affects Wear
- How Long Does Interior Paint Last in Real Homes and Commercial Spaces
- How to Clean Painted Walls Without Shortening Their Life
- Your Next Step: Booking a Walkthrough for a Longer-Lasting Finish
- Frequently Asked Questions
Why Interior Paint Fails Early: Adhesion, Curing and Resin Quality
Interior paint longevity usually suffers for one of three reasons: poor adhesion, rushed curing, or low-quality resin. Small mistakes in each area can cause peeling and dull patches within a season.
Adhesion is how well paint grips the surface underneath. Dusty, greasy, or glossy walls prevent proper bonding, so paint sits on top like a sticker and lifts over time.
Curing is when paint hardens into a durable film. It can feel dry within hours but often takes weeks to fully cure. Cold or damp rooms cure slowly, leaving a soft, scuff-prone film.
Resin quality refers to the binder holding pigment together.
Watch out: skipping cleaning and priming is the most common cause of early peeling. Paint applied over grease or old chalky residue may look fine on day one and fail within months.
Interior Wall Preparation Before Painting: Where Most Jobs Succeed or Fail
Preparation makes up most of a lasting paint job. Paint only performs as well as the surface beneath it. Most early failures trace back to skipped or rushed prep.
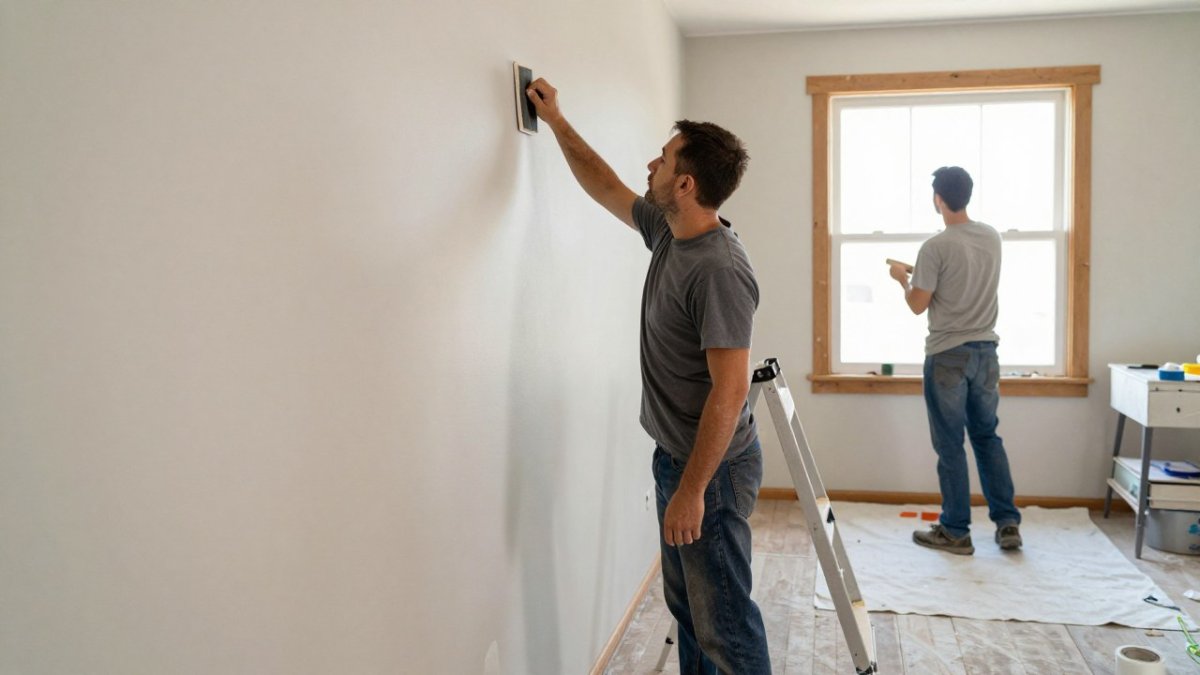
A typical prep process includes these steps:
- Remove outlet covers, switch plates, and hardware
- Wash walls with a mild detergent to remove grease and grime
- Scrape loose paint and sand smooth edges
- Repair cracks, holes, and dents
- Apply primer to bare or patched areas
- Mask trim, ceilings, and floors with quality painter's tape and drop cloths
Repairing Drywall, Nail Holes and Old Plaster
Small holes and cracks are easy to fix before painting. Fill nail holes with lightweight spackle, let dry, then sand flush. For drywall dents, apply joint compound in thin layers, feathering the edges outward.
Older homes need extra care. Plaster walls often have hairline cracks and uneven texture. Learn how to match the repair to the crack type before you prime and paint. Patch, sand, then prime, paint over an unprimed patch often shows a flat spot.
Primer, Moisture and Humidity Checks
Primer creates a uniform base that helps adhesion and coverage. Use it on new drywall, bare wood, stained surfaces, and heavy repairs. Stain-blocking primer handles water marks and smoke residue.
Moisture is another hidden risk. Paint will not bond to damp walls, and trapped moisture causes blistering. Check with a moisture meter or tape a plastic sheet to the wall for 48 hours; condensation behind it means the wall must dry first.
Watch out: painting in very humid conditions slows drying and can leave a soft film. Aim to paint when indoor humidity sits in a moderate range and the room stays at a temperature the paint manufacturer recommends.
The article breaks preparation into a sequence of steps, each one protecting the paint's grip and lifespan.
| Step | What to do | Why it matters |
|---|---|---|
| Remove hardware | Take off outlet covers, switch plates and hardware | Keeps paint off hardware and gives clean edges |
| Wash walls | Clean with a mild detergent | Removes grease and grime that block adhesion |
| Scrape and sand | Remove loose paint and smooth edges | Prevents loose paint from lifting later |
| Repair surface | Fill cracks, holes and dents | Creates an even base for the topcoat |
| Apply primer | Prime bare or patched areas | Improves adhesion and coverage |
| Mask | Tape trim, ceilings and floors with drop cloths | Protects surfaces you are not painting |
Best Paint Finish for High-Traffic Areas and How Sheen Affects Wear
Sheen affects both appearance and durability. Higher-sheen finishes clean more easily, while flatter finishes hide surface flaws better. The right choice depends on how the room is used.
- Matte or flat: Hides imperfections well, but stains easily and is hard to scrub. Best for ceilings and low-traffic bedrooms.
- Eggshell: A soft sheen that balances cleanability and appearance. Works well for living rooms and hallways.
- Satin: Resists moisture and scrubbing better than eggshell. A solid choice for kitchens, bathrooms, and kids' rooms.
- Semi-gloss: Very durable and easy to clean. Best for trim, doors, and cabinets, but it shows wall flaws clearly.
For high-traffic areas such as hallways, entryways, and stairwells, satin or eggshell finishes with a durable resin base perform best. Pair them with a quality topcoat and touch up scuffs early.
How Long Does Interior Paint Last in Real Homes and Commercial Spaces
Paint lifespan is not a single number. It depends on coating quality, surface preparation, sheen durability, and cleaning and touch-up.
Commercial spaces compress every timeline. Door frames, push plates, light switches, and the first 36 inches of wall take most contact wear.
Use physical signals, not the calendar, to decide when a repaint is due. Chalking, fine powder that comes off on a cloth, means the surface resin has broken down. Burnishing, shiny, darkened patches, means the coating no longer hides marks.
Watch out: a repaint over a failing film, chalking, blistering, or peeling, will fail on the same schedule as the coat beneath it, so the old surface must be corrected before any new paint goes on.
Repairing a Spot vs. Repainting the Whole Room
Not every problem needs a full repaint. Small scuffs, minor chips, and isolated stains can be spot-repaired: clean the area, lightly sand rough edges, prime bare surface, then feather the new paint into the wall.
Color matching is the limiting factor on spot repairs. Paint fades with age, so a touch-up from the original can read as a slightly different tone, especially on a sunlit wall.
Repaint the full room when damage is widespread, the color has faded unevenly, the old finish no longer cleans well, or the failure is adhesion-related rather than surface-level. Painting corner to corner usually gives the most even result, and on a wall with multiple repairs it is often faster than chasing individual spots.
How to Clean Painted Walls Without Shortening Their Life
Cleaning is where a durable paint job is either preserved or quietly worn down. The film is a thin polymer layer, and every cleaning method either removes soil from it or removes the layer itself.
Set a schedule rather than cleaning on impulse. Dust or vacuum walls with a soft brush monthly in high-traffic rooms and quarterly in bedrooms.
Match the cleaner to the sheen. Flat and matte films have more pigment and less binder at the surface, so they burnish when rubbed.
Use the mildest chemistry that works. A few drops of mild dish detergent in warm water handles most soil; for grease, a low-concentration degreasing dish soap is usually enough.
Rinse and dry. Detergent residue left on the wall attracts dust and can leave a streaky film.
A Maintenance Schedule That Extends the Repaint Interval
A written schedule can help a paint job reach its full potential lifespan. A practical pattern is monthly dusting, quarterly damp-wiping of high-contact zones, semi-annual detergent cleaning in kitchens and bathrooms, and an annual inspection of caulk lines, window frames, and walls behind furniture. Touch up scuffs and chips as they appear; a small repair done early prevents moisture from reaching the substrate.
Keep a small touch-up kit: a labeled container of the original paint, a foam roller, a sanding sponge, and a bit of primer. Store the paint tightly sealed and out of freezing temperatures, and note the date it was opened. Paint that has been frozen or sat for years may not cure properly, so test it on a hidden spot first. The kit turns a two-minute repair into a routine task.
Your Next Step: Booking a Walkthrough for a Longer-Lasting Finish
Long-lasting interior paint comes from careful prep, the right finish, and steady maintenance. Skipping any step shortens the life of the job.
If you are planning an interior painting project, a walkthrough is a practical first step. Cityscape Painting Company LLC serves Grass Valley, Nevada City, and Nevada County, and can review your walls, finishes, and prep needs before any work begins. Pricing depends on the size and condition of the project, so request an estimate from Cityscape Painting Company LLC for current figures tailored to your home or business. Before you commit, you can see a real cost comparison of hiring professional painters.
Frequently Asked Questions
How long should an interior paint job last?
Lifespan varies with conditions: kitchens, hallways and entry areas often need attention sooner than bedrooms because of grease, scuffs and frequent contact. Lifespan depends heavily on the quality of surface preparation, the primer used, the paint finish and how the walls are cleaned. Pricing for a repaint depends on square footage, prep needs and scheduling, so request a written estimate from Cityscape Painting Company LLC for current figures.
Which paint finish lasts longest on interior walls?
Satin and semi-gloss finishes generally resist scrubbing and moisture better than flat or matte paint, which makes them a practical choice for high-traffic areas, trim, doors and kitchens and baths. Eggshell offers a middle ground for living spaces that need some washability without much shine. The finish matters less than getting the surface prep and primer right, because a glossy paint applied over a poorly prepared wall will still fail early.
How do you clean painted walls without damaging the finish?
Wait until the paint has fully cured before scrubbing, which often takes several weeks for newer paint, and start with dusting and a damp microfiber cloth. For grime, use a mild detergent in lukewarm water, work in small sections, and rinse with a clean damp cloth. Avoid abrasive pads, bleach and harsh solvents, which can dull the topcoat and wear through the paint film over time.
Can you make an existing paint job last longer?
Yes. Clean walls regularly with a mild detergent, touch up scuffs and chips promptly, and address moisture sources such as poor ventilation in bathrooms and kitchens. Spot repairs of peeling or cracked areas, followed by proper priming and a matching topcoat, can be a practical alternative to repainting a whole room. Cityscape Painting Company LLC can assess the condition of your walls and recommend whether repair or repainting makes more sense.
